This page provides detailed instructions for installing PuTTY on Windows 10, 8, or 7. However, installation should be very similar on other versions of Windows as well.
Contents
Download installation package Starting the installer Configuring and installing Running PuTTY How to get a server Other SSH clients How-tosDownload installation package
First you need to obtain a copy of the installation package (e.g., putty-<version>-installer.msi). If you have a 64-bit computer, it is recommended that you install the 64-bit version putty-64bit-<version>-installer.msi. Almost any computer bought after 2015 has a 64-bit processor, except for the very cheapest ones. Many high-end computers sold several years before that. If you don't know or don't care, it is always safe to use the 32-bit version (putty-<version>-installer.msi).
You can download the installer here.
Starting the installer
On Windows 10, the Edge browser offers to run the installer when the download is complete. Just click to install the software.
On older versions of Windows, you may need to run the installer manually. Open the Windows Explorer (right-click on the Windows logo in the bottom left corner), navigate to the Downloads directory (or wherever you saved the installer), and double-click on the file name. A detailed description can be found here. Note, however, that the installation has to be performed with Administrator rights (either using the Administrator account or your personal account must have Administrator permissions).
Occasionally, some people have problems installing MSI files. The video here may help.
How to install an MSI file on Windows 7, 8, and 10
Configuring and installing
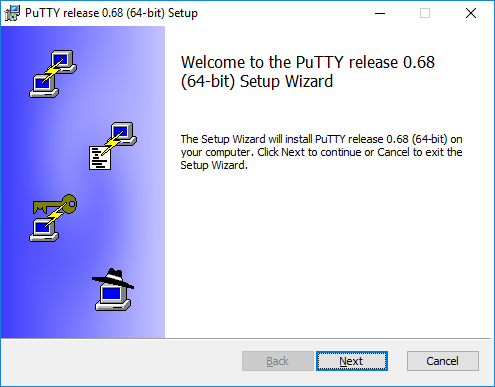
When the installer starts, it shows the welcome screen. Just click Next.
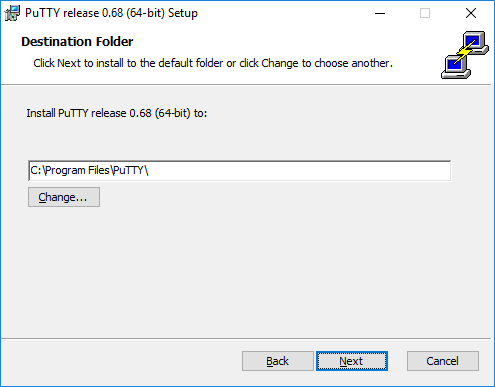
The installer then asks for the Destination folder in which to install the software. Almost always it is best to use the default value. Just click Next.
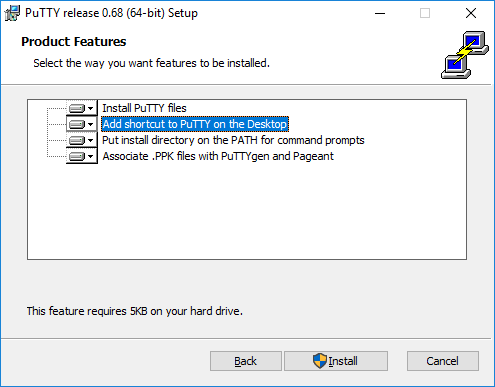
Then, the installer asks to select product features to install. You probably want to add a shortcut on the desktop if you expect to use the software frequently. All the other options generally should be enabled. When ready, click Install.
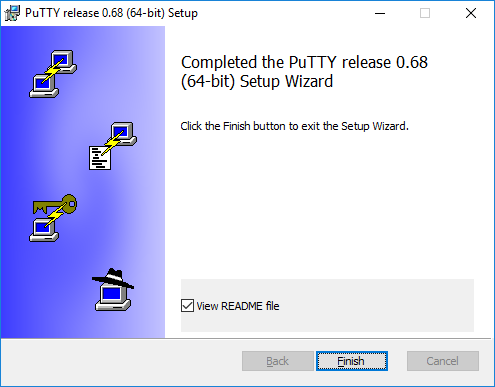
When the installation has completed successfully, it should show a "Completed" screen. Click Finish to exit the installer.
Running PuTTY
Once installation successfully completed, you should test to make sure that PuTTY runs correctly and you can find the program. If you installed a shortcut on the desktop, you should be able to find the icon for PuTTY. Try (double-)clicking on the icon. It should start the software.
Otherwise, you should be able to find the software from the Windows Start menu in the bottom left corner of the screen. The menu looks different in each version of Windows. On Windows 10, scroll down until you see "PuTTY". Open the group, and select "PuTTY".
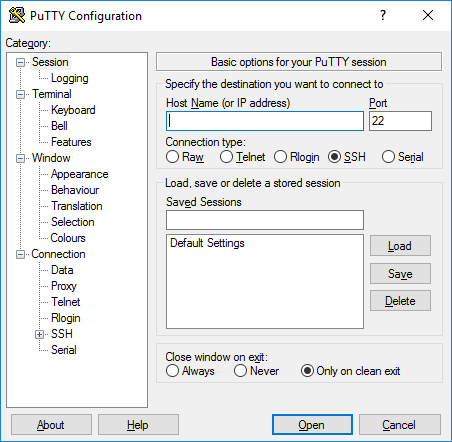
When the software starts, you should get a window with the title "PuTTY Configuration" with a field Host Name in the upper middle part. Try entering a host name to connect to in that field, and click Open.
 How to get a server
An SSH client is intended to be used for connecting to an SSH server. Since you hare installing one, you presumably have a server to connect. The server may be at your university, work, or home. You need a host name (e.g., students.example.edu) or IP address (e.g., 177.33.189.54) to connect to. Enter the host name or IP address in the Host Name field.
If you don't have a server but want one, try installing Tectia SSH Server for Windows or IBM mainframes or OpenSSH on Linux.
Other SSH clients
While PuTTY is a good client, it is rather old. Its user interface is very old-fashioned and it does not provide a graphical interface for transferring files. For alternatives, see other SSH clients.
How-tos
For further tutorials, see:
