This page explains SSH tunneling (also called SSH port forwarding), how it can be used to get into an internal corporate network from the Internet, and how to prevent SSH tunnels at a firewall. SSH tunneling is a powerful tool, but it can also be abused. Controlling tunneling is particularly important when moving services to Amazon AWS or other cloud computing services.
Contents
What is an SSH tunnel? Who uses SSH tunneling? Benefits of SSH tunneling for enterprises SSH tunneling in the corporate risk portfolio How to configure an SSH tunnelWhat is an SSH tunnel?
SSH tunneling is a method of transporting arbitrary networking data over an encrypted SSH connection. It can be used to add encryption to legacy applications. It can also be used to implement VPNs (Virtual Private Networks) and access intranet services across firewalls.
SSH is a standard for secure remote logins and file transfers over untrusted networks. It also provides a way to secure the data traffic of any given application using port forwarding, basically tunneling any TCP/IP port over SSH. This means that the application data traffic is directed to flow inside an encrypted SSH connection so that it cannot be eavesdropped or intercepted while it is in transit. SSH tunneling enables adding network security to legacy applications that do not natively support encryption.
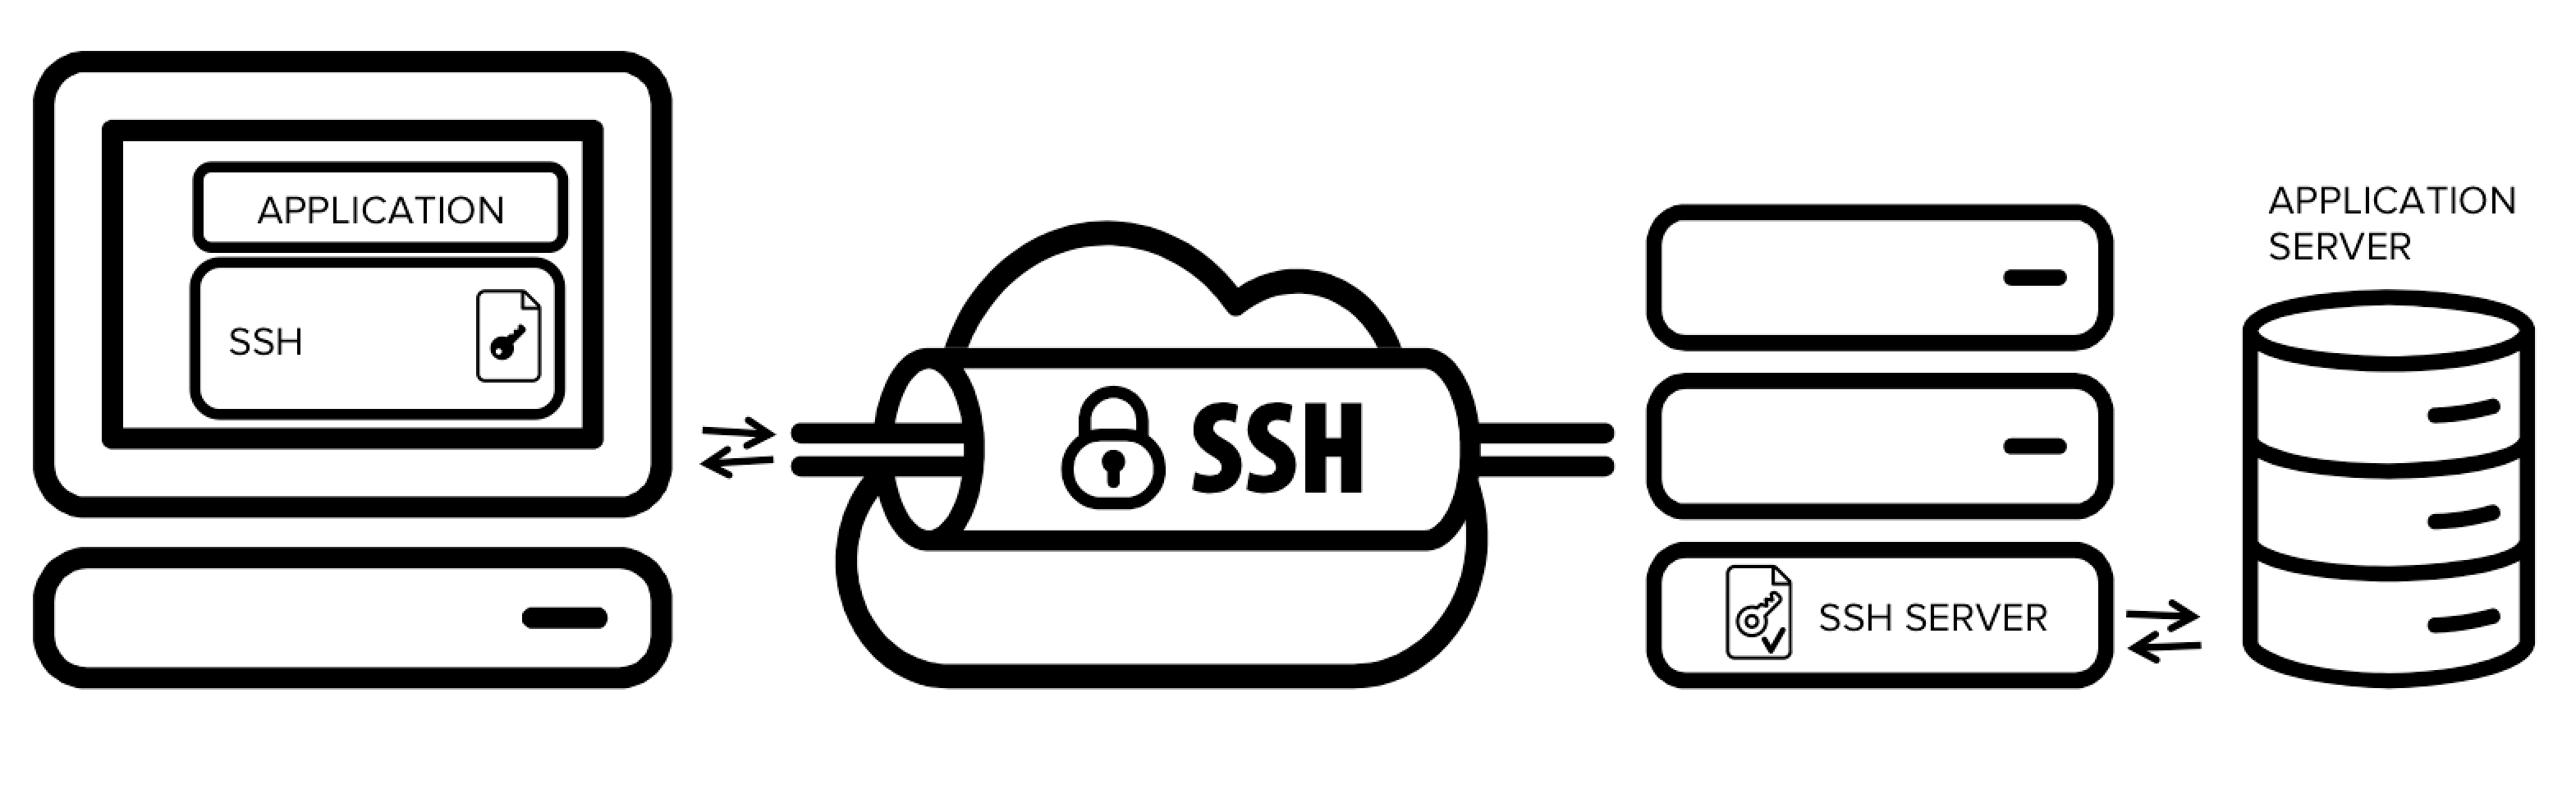
The figure presents a simplified overview of SSH tunneling. The secure connection over the untrusted network is established between an SSH client and an SSH server. This SSH connection is encrypted, protects confidentiality and integrity, and authenticates communicating parties.
The SSH connection is used by the application to connect to the application server. With tunneling enabled, the application contacts to a port on the local host that the SSH client listens on. The SSH client then forwards the application over its encrypted tunnel to the server. The server then connects to the actual application server - usually on the same machine or in the same data center as the SSH server. The application communication is thus secured, without having to modify the application or end user workflows.
Who uses SSH tunneling?
The downside is that any user who is able to log into a server can enable port forwarding. This is widely exploited by internal IT people to log into their home machines or servers in a cloud, forwarding a port from the server back into the enterprise intranet to their work machine or suitable server.
Hackers and malware can similarly use it to leave a backdoor into the internal network. It can also be used for hiding attackers's tracks by bouncing an attack through multiple devices that permit uncontrolled tunneling.
To see how to configure an SSH tunnel, see this example. Tunneling is often used together with SSH keys and public key authentication to fully automate the process.
Benefits of SSH tunneling for enterprises
SSH tunnels are widely used in many corporate environments that employ mainframe systems as their application backends. In those environments the applications themselves may have very limited native support for security. By utilizing tunneling, compliance with SOX, HIPAA, PCI-DSS and other standards can be achieved without having to modify applications.
In many cases these applications and application servers are such that making code changes to them may be impractical or prohibitively expensive. Source code may not be available, the vendor may no longer exist, the product may be out of support, or the development team may no longer exist. Adding a security wrapper, such as SSH tunneling, has provided a cost-effective and practical way to add security for such applications. For example, entire country-wide ATM networks run using tunneling for security.
SSH's Tectia SSH Client/Server is a commercial solution that can provide secure application tunneling along with SFTP and secure remote access for enterprises.
SSH tunneling in the corporate risk portfolio
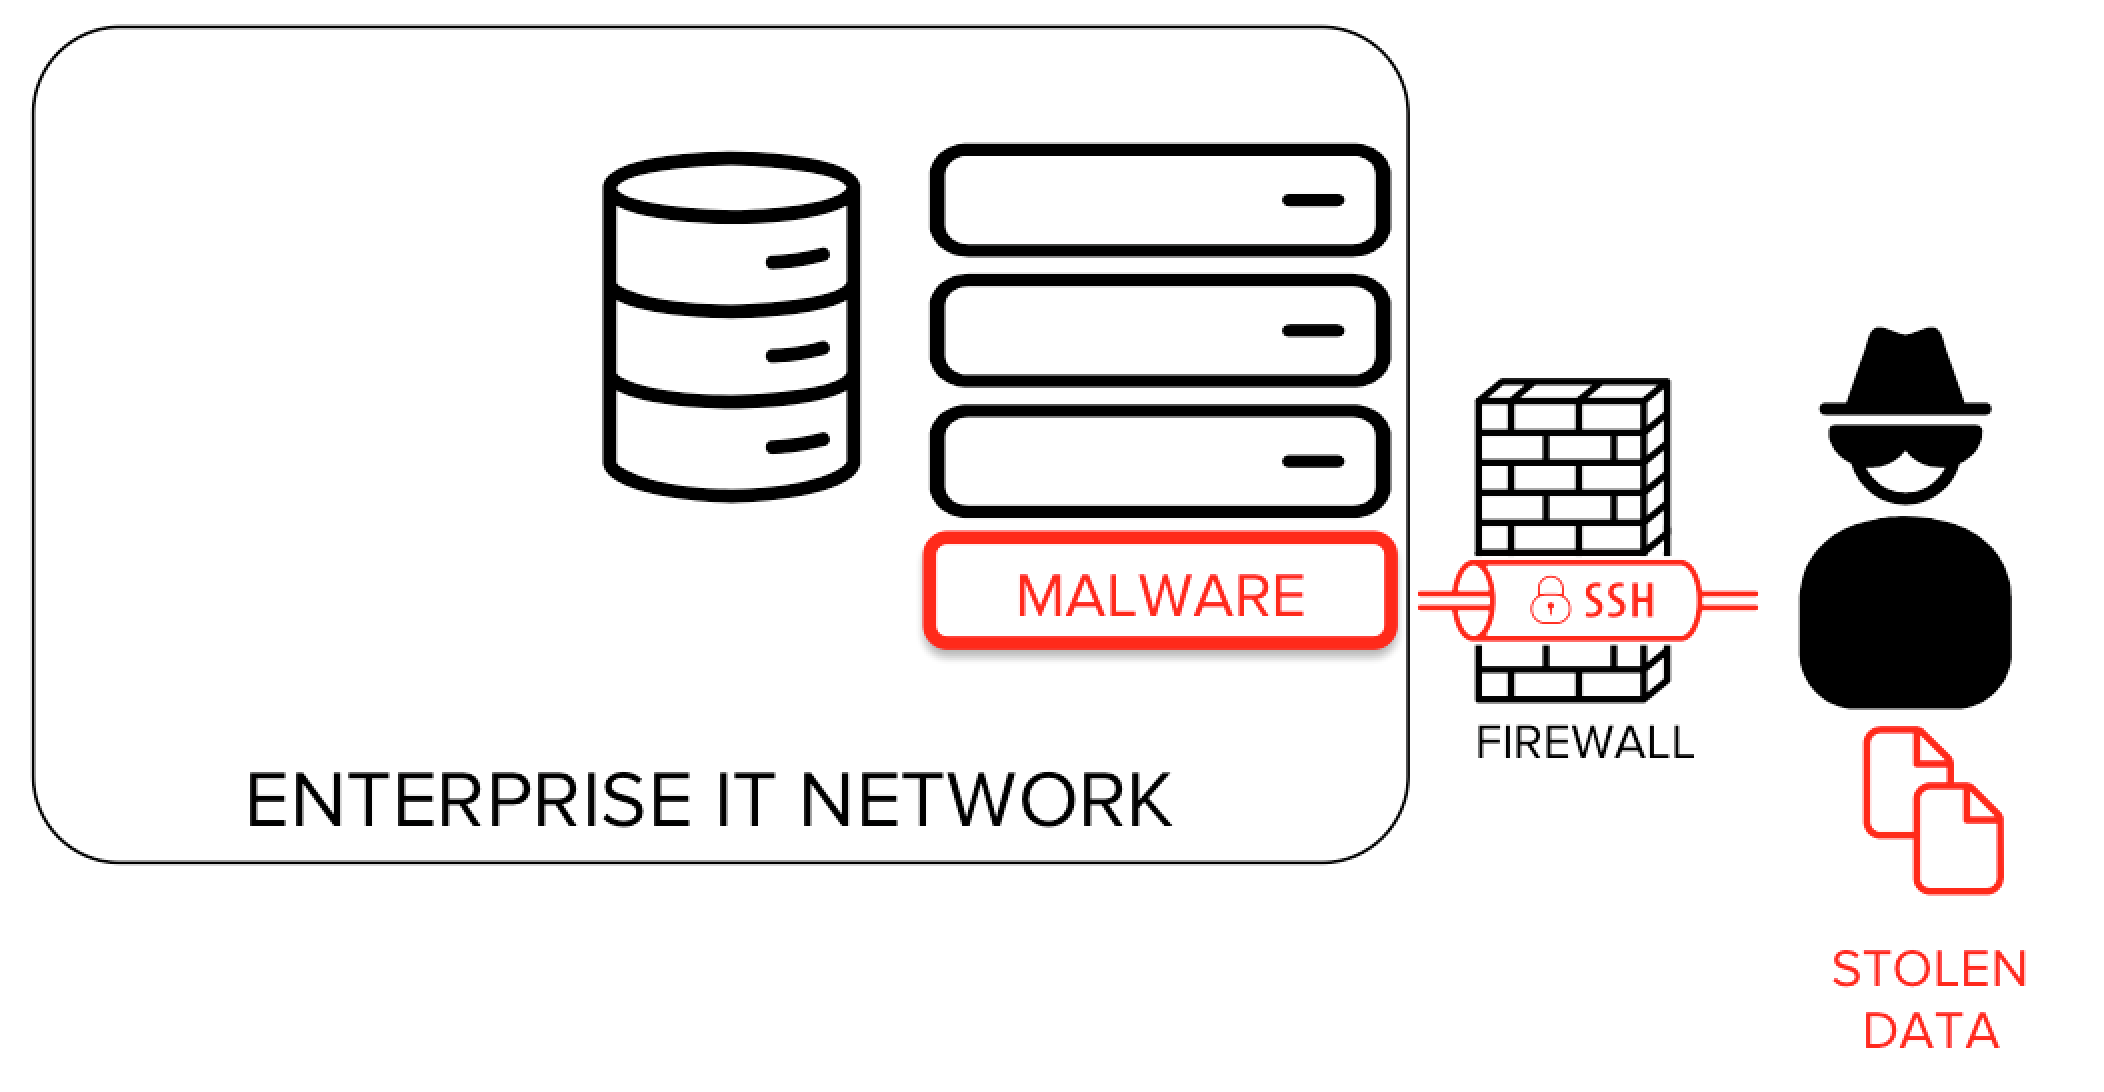
As useful as SSH tunneling is, it also creates risk that needs to be addressed by corporate IT security teams. SSH connections are protected with strong encryption. This makes their content is invisible to most deployed network monitoring and traffic filtering solutions. This invisibility carries considerable risk potential if it is used for malicious purposes such as data exfiltration. Cybercriminals or malware could exploit SSH tunnels to hide their unauthorized communications, or to exfiltrate stolen data from the target network.
In an SSH back-tunneling attack, the attacker sets up a server outside the target network (in Amazon AWS, for example). Once the attacker is in the target system, she connects to the outside SSH server from the inside. Most organizations permit outgoing SSH connections, at least if they have servers in a public cloud. This SSH connection is set up with an option that enables TCP port forwarding from a port on the external server to an SSH port on a server in the internal network. Setting up this SSH back-tunnel requires a single one-line command on the inside, and it can easily be automated. Most firewalls offer little to no protection against it.
There are several widely known and documented cases of malware leveraging the SSH protocol as a means for hiding data exfiltration and command channels. Several instances of malware have been actively collecting SSH keys. Captured and collected SSH keys have also been sold on hacker forums.
Combined with attacks based on unmanaged SSH keys, SSH tunneling allows an attacker to utilize stolen SSH keys for an intranet from the public Internet.
SSH tunneling attacks can also be used for hiding the source of the attack. It is common or hackers to bounce attacks off systems and devices that allow SSH port forwarding to hide their tracks. This allows them to probe for vulnerabilities, try various login credentials, or run attack tools against email, web, telephony and any other protocols. Bouncing an attack through a dozen random devices via encrypted tunnels also carrying other traffic makes it virtually untraceable. Akamai documented millions of IoT devices being used in this way.
Countering these risks requires the capability to monitor, control and audit encrypted SSH connections. For preventing bouncing, it requires proper configuration and hardening of IoT operating systems.
It should also be noted that tunneling attacks are not specific to SSH - a competent programmer can write a tool to tunnel ports in a few hours and can run it on any machine on the internal network. Any laptop or other device on the internal network can do it - it just needs to be able to communicate with some (any) service on the Internet. Such a tool could be made to work over SSL/TLS, could emulate HTTP, or could operate over UDP and use packets that look like DNS requests and responses. SSH just makes it easier for non-programmers. You can only protect from tunneling attacks against people who are able to run software on the inside or connect any device to the internal network by only allowing protocols you can inspect through the firewall.
How to configure an SSH tunnel
See the configuration example page for detailed configuration instructions. The SSH command line options and SSH server configuration file pages may also be helpful.
